Adding devices
Once you've created a customer account, you can add new devices to it by using OvrC Pro, scanning a QR code, or entering the MAC address and serial number.
Note: Only OvrC Pro Hubs can scan third-party devices connected to the network.
Using OvrC Pro
If there is an OvrC Pro device on-site, it scans your network and automatically adds devices that if finds (unless they've already been claimed).
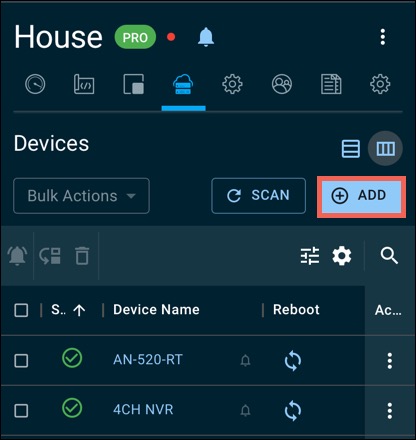
You can start an OvrC Pro scan by going to the Devices list and clicking the Scan button at the top of the device list.
Scanning the QR code
-
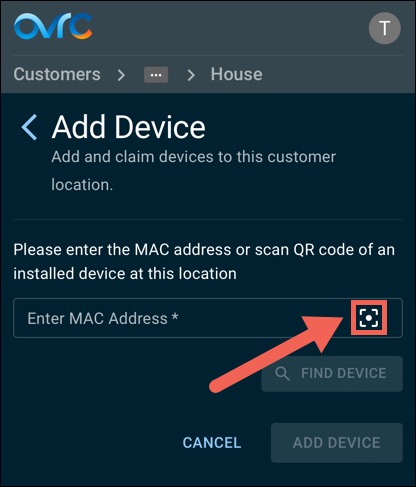
On the next page, tap the Scan button. You may need to allow OvrC to access your mobile device's camera. Then center the QR code on the product box in the outline to scan it in.
-
Enter the device's Service Tag or Serial Number and click Verify. For Snap One devices, you can find the serial number on a sticker on the outside of the box. This number commonly starts with "ST" and is sometimes referred to as a Service Tag.
-
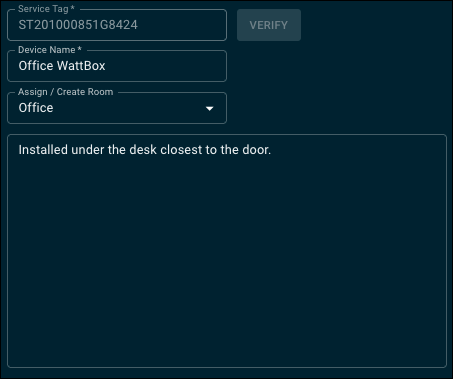
Enter a name for the device, assign it to a room, and add any helpful notes. Click Add Device to complete the process.
Entering the MAC address and serial number
-
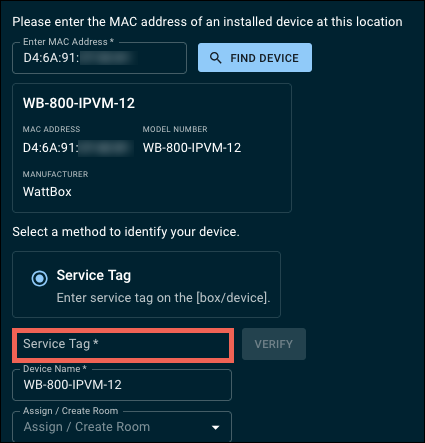
On the next page, enter the device's MAC address and click Find Device. For Snap One devices, the address is on a sticker on the outside of the box.
-
Enter the device's Service Tag or Serial Number and click Verify. For Snap One devices, you can find the serial number on a sticker on the outside of the box. This number commonly starts with "ST" and is sometimes referred to as a Service Tag.
-
Enter a name for the device, assign it to a room, and add any helpful notes. Click Add Device to complete the process.
To add more devices, click the + Add Device button and repeat the steps above. If you manually added an OvrC Pro device, allow it to scan the rest of the devices on the network.


